Summer Gardening Series: Growing Green Beans

Last week we outlined Twin Pines’ advice for growing delicious summer Zucchini. This week, we’ll walk you through the When, Where, and Care for Growing Green Beans in your summer garden!

Don’t forget: Check back weekly for gardening tips, guides, and even some favorite summer veggie recipes from the Twin Pines Team!


Green Beans – 

Green Beans are a delicious summer vegetable, and a fun summer plant to garden! There are a variety of types of Green Beans, including Pole Beans, Bush Beans, Runner Beans, Yardlong Beans, and more! In this article, we will focus on the two most popular variations: Pole Beans and Bush Beans.

When To Plant:

Green Beans of any type should be planted after soil has warmed up during the late spring months. There should be full sun available to the plants for many hours of the day, making post-summer solstice timing ideal.

Where To Plant:

These delicious veggies should be planted in fertile soil that is rich in nutrients. If you can find a way to include compost into the garden beds you plant them in, they will also thrive.

Growing Pole Beans:

Green Beans that are grown on a vertical pole are a popular option, as they not only grow into delicious vegetables, but save a lot of space in a garden as they grow towards the sun.

Before you begin, you must first build a tipi or trellis for the plant to grow around. Once this structure has been built, for the best results be sure to plant pole beans about 6-10 inches apart so they have plenty of distance to grow.

Keep in mind that these plants will climb upwards over time on a vine that may reach up to 15 feet tall. For that reason we recommend creating a structure that extends as far and that can last through the season, as Pole Beans also tend to produce over and over again through the first frost of fall. This is one of the biggest benefits of choosing Pole Beans over Bush Beans, which do not produce as continuously.

Growing Bush Beans

Unlike Pole Beans, Bush Beans grow horizontally on their own bushes rather than up towards the sky. The shorter height of these plants, which typically does not exceed two feet,  is often more conducive to a generic garden’s shape and size.

To grow these Bush Beans, plant seeds 3-6 inches apart with a 1-2 feet of space between the rows in soil that is drained but has a great exposure to sun. These plants should produce a crop in about two weeks, and will also continue to grow throughout the season. That being said, in order to grow the largest amount possible, replant a couple weeks apart for the best results.

Post-Planting Care

Although drained soil is ideal for planting purposes, it is incredibly important to keep soil moist during flowering and fruiting. For that reason, experts recommend using mulch along the base of plants to help lock in the moisture and keep the soil cool during hot months.

Gardeners should also be sure to water the beds evenly until the seedlings begin emerging from the ground, with about 1-1.5 inches of water per week. Green Beans will thrive best with a drip irrigation system as opposed to overhead or garden hose watering.

Harvesting The Green Beans

Unlike some other vegetable varieties, Green Beans should be harvested at an immature stage, before the seeds have fully developed.

To physically harvest the plant, locate a single pod that looks to be about mature in size and snap or cut it off from the vine without tearing the plant. If a bean is fresh and ready to be picked, it should snap off the vine without difficulty.

In order to keep the harvest going all summer long, its is recommended to sow beans every two or so weeks.

*Bonus: Twin Pines’ Favorite Green Bean Recipes*

beansbaconpecans
Green Beans with Bacon and Pecans via “Savory Sweet Life”
Beer-Battered-Fried-Green-Beans-Lady-Behind-The-Curtain-2
Beer Battered Green Beans via “Lady Behind the Curtain”
garlicbeans680
Asian Garlic Green Beans via “The Garden Grazer”
green beans (2) copy font
Smothered Green Beans via “Plain Chicken”
green-beans-stir2
Roasted Green Beans with Pancetta, Red Onions, and Garlic via “Creative Culinary”

Summer Gardening Series: Growing Zucchini

Many of Twin Pines’ customers use the warm months of summer to garden, and for years we have been helping not only create spaces in their landscapes to grow these fruits and vegetables, but in many cases, have actually helped maintain them as they grow. For that reason, throughout this season, we will be sharing tips from the Twin Pines gardening experts! With our help, hopefully you too can grow delicious produce right in your own backyard!

Check back weekly for gardening tips, guides, and even some favorite summer veggie recipes from the Twin Pines Team!


Zucchini – 

Zucchini is an incredibly popular summer vegetable to grow, mostly because, when cared for correctly, it can be harvested a mere 40-60 days after being planted. That means diligent gardeners may be able to get a full 2-3 crops of these veggies grown by the end of the summer! Check out these expert tips from Twin Pines for growing the best zucchini this season:

When To Plant

For the best results, Zucchini seeds should not be planted until after you are sure the last frost of winter has passed, as this vegetable does not tolerate cold temperatures. The ideal soil temperature for planting is between 60 and 65 degrees Fahrenheit; at this warmth, the Zucchini plants will thrive.

Where To Plant

Zucchini seeds should be spread out when planted in order to grow properly. At minimum, they should be inserted into soil mounds 3-4 feet apart from one another. The benefit of planting in a soil mound is that it allows you to plant the seed about an inch below the surface of the soil, while still giving the roots excess room to grow downwards. For the best results, these hills should be between 6 and 12 inches high and about one to two feet wide.

Post-Planting Care

Zucchini is a thirsty plant, which requires roughly 2 inches of water per week to remain fully hydrated. For that reason, it is important that the soil around the plants remain consistently moist. This can be accomplished by hand-watering, or with the use of an installed irrigation system.

Gardeners may also want to consider mulching around the plants once the seeding has been established, as this helps keep the temperature of the soil below the mulch stable and the moisture from watering locked in.

*Bonus: Twin Pines’ Favorite Zucchini Recipes*

zucchini-tots-15
Parmesan Zucchini Tots via “Kirbie’s Cravings”
zucchini-oat-chocolate-chip-cookies7+srgb.
Zucchini-Oat Chocolate Chip Cookies via “Cooking Classy”
Shrimp-Zucchini-Noodles
10-Minute Lemon Garlic Butter Shrimp & Zoodles via “Eat Well 101”
gallery-1510169389-zucchini-enchiladas-delish
Zucchini Enchiladas via “Delish”
Chicken-Parmesan-Zucchini-Boats-4
Chicken Parmesan Zucchini Boats via “The Wholesome Dish”
gallery-1464039955-delish-summer-salads-caprese-zoodles
Caprese Zoodles via “Delish”


5 Must-Have Items Every New Englander Needs in Winter

New Englanders love their four seasons, but winter is often the one that causes the most heartache for homeowners, especially when they’re left unprepared. Browse through Twin Pines’ list of must-have items for your winter tool kit, and stock up before the next storm hits!


1. Snow Blower/Shovel

Man Operating Snow Blower

Perhaps the most obvious item to have in your winter tool kit is one which can help you manage the snow on your property. Whether you prefer to shovel or snow blow, having a sturdy, up-to-date piece of equipment is vital when the powder begins to pile up.

A Twin Pines Tip: Get to know your machinery beforehand! Snow blowers especially need a lot of prep–including ensuring they are gassed up and ready to go for the first snowfall. But even familiarizing yourself with the weight, capacity, and functions of your shovel can help make the task of actually shoveling a lot more manageable.

2. Ice Melt & Scoop

Walmart
Photo Credit: www.walmart.com

Ice melt is another New England must-have during winter. When the temperature fluctuates between freezing and warm one week to the next, water that gathers on the ground can freeze, unfreeze, and refreeze in succession, creating slippery and dangerous walking and driving conditions. Sprinkle ice melt on stairs, walkways, driveways, and more to help break down the ice.

A Twin Pines Tip: Don’t forget to invest in a scoop to help distribute the ice melt. Anything from a metal shovel to a plastic cup will work, but you want to avoid letting the ice melt touch your skin, especially when dealing with a brand made with calcium or magnesium chloride.

3. Pantyhose

snow-removal-pantyhose-calcium-chloride
Photo Credit: champaignrose.com

This may seem like a strange item to have in your tool kit, but its not one you’re going to want to forget about. Experts use pantyhose filled with calcium chloride to help break down ice and snow on the roof, as the permeable nylon material allows the chemical to secrete through the fabric without touching the roof directly and causing any damage.  For more on the Pantyhose Method, check out this post from Twin Pines.

4. Roof Rake

Snow Roof Rake

Roof rakes are another incredibly beneficial item to have in your winter toolkit. Rather than using a damaging shovel to try to scrape excess snow, homeowners with pitched roofs should use these tools to clear 2-3 inches off. You can find roof rakes at your local hardware store.

5. Kitty Litter

bigstock-Cat-Litter-Box-50667332.jpg

The main use of kitty litter in your winter tool kit does not in fact have anything to do with your pets. Instead, this crumbly product can be used to create traction on snowy and icy surfaces in winter, creating safer walking and driving spaces for you and your family.

A Twin Pines Tip: Keep a bag of kitty litter in the trunk of your car during winter for extra precaution. It can be spread out beneath your tires if you ever get stuck in an icy or snowy spot and can’t seem to get the grip you need to drive away!


Follow Twin Pines on Facebook and check back here on our blog for more winter tips from Twin Pines!

Twin Pines’ Thanksgiving Recipe Book 2017

recipes-section
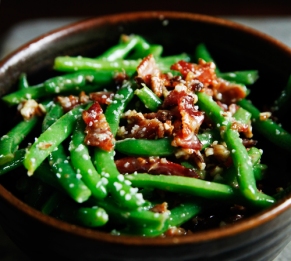
During Thanksgivings past, Twin Pines has collected some favorite Thanksgiving recipes, dissected them for popular fruit/vegetable choices, and then taught our readers how to grow those most popular fruits/veggies for the next Thanksgiving! Check out the latest crop of recipes contributed by Twin Pines customers, fans, and friends in the Twin Pines Thanksgiving Recipe Book 2017 below!

And if you’d like to check out our past Recipe Book, you can do so here!


Granola Stuffed Acorn Squash – Contributed by Instagram user cascadianfarm

Check out the full recipe from the website below:

Granola Crusted Acorn Squash

Note: This recipe was originally published on www.tablespoon.com and is not the intellectual property of Twin Pines Family of Companies.

Continue reading

11 Garden Marker DIY Guides To Help You Label Like A Pro

Add a splash of color and creativity into your garden with any of these unique, personalized garden marker ideas!

1. Lean into your mason-jar obsession with these simple but trendy markers.

marthastewart

Traditionalists know that in the days before Pinterest, gardeners marked their produce with the empty packets of seeds stuck onto a stick. It was a simpler time, before aesthetic became so important, and yet this theme lives on with these mason jar markers. These are truly just the same seed packet on a stick, with the added bonus of protection from the elements by encasing the packet it in a glass jar. Find more about making these on MarthaStewart.com!

2. Spell out success with these Scrabble-inspired markers.

Scrabble Leter

Utilize your old board game pieces to spell out the names of your fruits, veggies, and herbs hiding below the ground! Materials include: Scrabble Tiles, Paint Paddle Stirring Sticks, Red Decorator Spray Paint, and Glue! Find the full guide on The Farm Girl Gab’s!

3.  Add a rustic vibe to your garden with a basic brick marker.

Woohome

All you need are some bricks and an Expo marker to create these crisp and clear garden pieces! The writing runs the risk of fading due to exposure to outdoor elements, and although some homeowners may prefer the weathered look, you can avoid fading by investing in a layer of clear topcoat paint to hold the color in place. Find the full DIY guide on the Simple Details Blog.

Continue reading

A Letter From Your Plants On Fourth of July Weekend

It’s that time of year again…

Twin Pines Family of Companies Blog

Dear Family,

Now, we’re not the type to complain, but there’s a problem we’ve been noticing about your “summer habits” that we think we need to address. It’s about… Fourth of July weekend, and the fun you tend to have without really giving your plants a second thought.

We get it, it’s a full weekend to celebrate summer! There are cookouts, and fireworks, and late-night partying; it’s no wonder you guys are off having a great time. Believe us, if we weren’t rooted to the spot, we’d leaf in a heartbeat and join the fun! But sadly we cannot. We are stuck standing idly by while you and your guests have a good time, right under our branches.

But it doesn’t have to be like this! There are lots of ways to help send the party our way this Fourth of July, and we’ve decided to let you in on the secret:

  1. It’s a holiday weekend…

View original post 358 more words

15 Trendy Accessories To Take Your Swimming Pool Game To The Next Level This Summer

Whether or not you have a pool in your backyard, these amazing accessories will be sure to put a splash of excitement into your summer!

Pool Trends 2017_2

1. This giant pizza float that is almost as hilarious as it is appetizing.

SwimlinePoolPizzaSlicePoolFloat_Hayneedle

The “Swimline Pool Pizza Slice Pool Float” comes in single slices, sets of 2, or sets of 8 to make up the whole pie! It is recommended for use by adult riders. Get it from Hayneedle for $224.71.


2. An adjustable, floating umbrella to help keep you out of the sun when spending time in the water.

Umbrella_Sunplay

Made of UV-rated fabric and equipped with a handy drink buoy at the base, the “Shade Science Pool Buoy” can add a great mix of style and function to your pool. Get it from Sunplay for $149.00.

Continue reading

15 Fabulous Fire Pits For Your Yard This Spring

Adding a hardscape feature in your yard can go a long way! So, this season, why not try one that’s both fun and functional? Fire Pits offer the perfect blend of style and practicality, and make for a great outdoor activity that the whole family can enjoy! Browse through these 15 Fabulous Fire Pits below and find the perfect one for your home this spring!

FIRE PIT 2

1. This copper fire pit that’s basically a Moscow Mule glass for your yard.

1

The “Red Ember Eden Copper Wood Burning Fire Pit” comes with the bowl and stand, a spark screen, a grate, and a poker! Get it from Hayneedle for $279.98.

2. A multi-angled, stand alone fire pit with its very own smoke stack.

8

The “Cavo Custom Octo-Pit” is created to resemble an Archimedean Solid, and the attached smoke stack allows smoke to filter up and out of the way instead of back at you! Get it from Woodland Direct for $741.00.

3. This stylish square pit perfect for any sized patio. 

12

The “Trent Steel Fire Pit” includes a slate ledge around the bowl for a buffer from the fire, and a pyramid-shaped guard to prevent sparks from flying! Get it from Wayfair for $378.99.

Continue reading

Protecting Your Home From The Cold – Plumbing & Chimney Edition

We at Twin Pines know that proper preparation is the best way to prevent damage, especially when it comes to snow and low temperatures. Our guide to Protecting Your Landscape from Snow provides tips for preventing damage to the area outside of your home from the landscaping experts at Twin Pines. This edition of the Protection Plan for your Home, will feature advice from our Plumbing and Chimney experts, and will highlight how to keep these vital aspects of your home safe in the cold.

Plumbing Preparation.png

Bursting pipes and damaged plumbing systems are always a hazard in the extreme cold. One of the most sufficient ways to prevent this damage is with proper insulation. In areas that are most vulnerable to temperatures, including attics, crawl spaces, and walls on the outside of the home, wall insulation should surround pipes to help keep them warm and safe.

Continue reading