Add a splash of color and creativity into your garden with any of these unique, personalized garden marker ideas!
1. Lean into your mason-jar obsession with these simple but trendy markers.
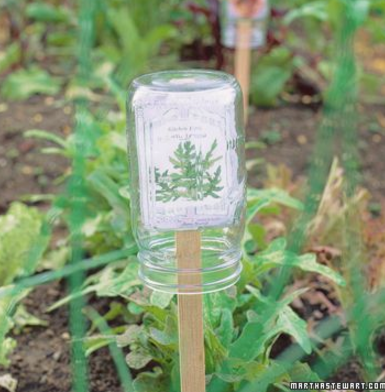
Traditionalists know that in the days before Pinterest, gardeners marked their produce with the empty packets of seeds stuck onto a stick. It was a simpler time, before aesthetic became so important, and yet this theme lives on with these mason jar markers. These are truly just the same seed packet on a stick, with the added bonus of protection from the elements by encasing the packet it in a glass jar. Find more about making these on MarthaStewart.com!
2. Spell out success with these Scrabble-inspired markers.
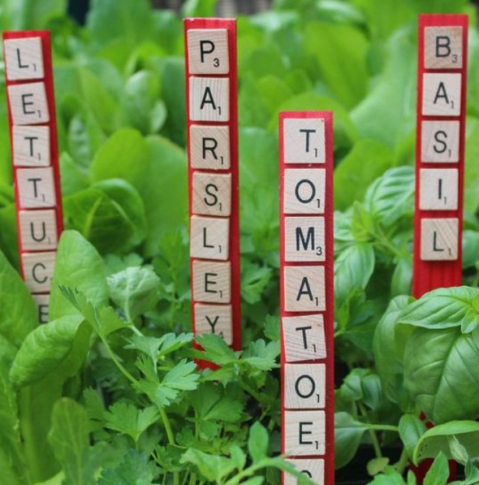
Utilize your old board game pieces to spell out the names of your fruits, veggies, and herbs hiding below the ground! Materials include: Scrabble Tiles, Paint Paddle Stirring Sticks, Red Decorator Spray Paint, and Glue! Find the full guide on The Farm Girl Gab’s!
3. Add a rustic vibe to your garden with a basic brick marker.
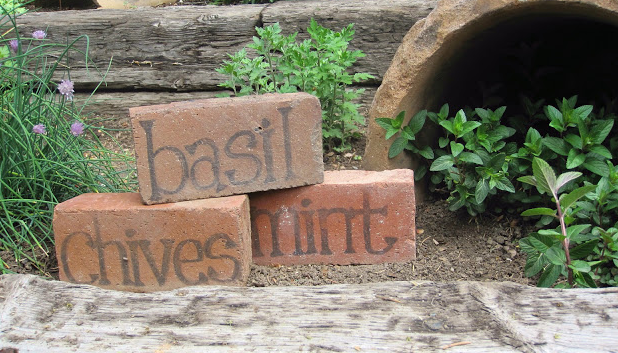
All you need are some bricks and an Expo marker to create these crisp and clear garden pieces! The writing runs the risk of fading due to exposure to outdoor elements, and although some homeowners may prefer the weathered look, you can avoid fading by investing in a layer of clear topcoat paint to hold the color in place. Find the full DIY guide on the Simple Details Blog.