Mother’s Day is a wonderful opportunity for children and families to show their mother figures how much they mean to them. More often than not, this gesture comes in the form of a bouquet of spring flowers. It’s the perfect gift–beautiful, fragrant, and fun. The only downside can be the often pricey options offered at florists around the country during this time of demand for such flowers.
However, purchasing these pricey arrangements isn’t the only option when it comes to Mother’s Day flowers. Try growing them yourselves in your garden this year!
Twin Pines took the liberty of collecting images of beautiful Mother’s Day flower arrangement from across the country and dissecting them to figure out what the most popular kinds of flowers are for the occasion. We then consulted our expert landscapers and gardeners, and compiled some of our best tips for planting and growing these flowers yourself!
As you can see by browsing through the images above, there was a wide variety in flower types used in arrangements this Mother’s Day. Yet, we were able to identify the top three species of flowers as Roses, Tulips, and Daises. These flowers are all very common, and are fairly simple to grow and maintain in a personal garden! Check out our step by step guide below for each plant, then [Tweet] us your questions or thoughts!
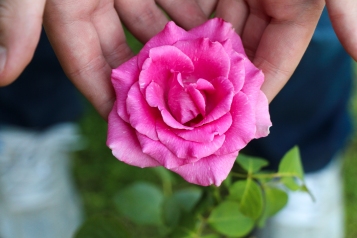
Roses:
Roses were the number one most popularly used flower in Mother’s Day flower arrangements. Perhaps this is due to the variety of colors, the sweet fragrance, or the fact that people often associate the flower with love. No matter the reason, roses are a great choice for any bouquet throughout the year, and are thus a great choice for growing in your garden!
While there are many varieties of rose species, many of them have the same basic growing principles, including the fact that they should be planted in spring months.
Before you plant roses there are quite a few factors to consider, including the location of your plant. Roses need at least 5-6 hours of sun each day, so they should be planted in a fairly open area. It’s also important that their roots have plenty of opportunity to receive nutrients. If roses are planted too close to other shrubs or trees, the competition may be too great for the flowers. You should also considering planting rose shrubs roughly 18 feet apart from one another as they grow in masses. If you are trying to create a hedge or cluster look in your rose bushes, certain varieties of the flower cater to that.
Roses also thrive in a very specific type of soil, with a near-neutral pH count of 5.5 to 7.0. If soil is too acidic—which is often a problem for rose gardeners—try adding in lime to help with the balance. (Expert Hint: To find out which rose varieties will grow best in the soil in your area, check your local nursery and see what they are selling. While those plants may be fully grown, you then know what kind of seeds or budding plants to look for!)
Plant roses as soon as possible after you buy them, as the longer they are kept out of the ground, the weaker they can become. Monitor the roots of the plants pre-installation to make sure they never go dry, and make sure to soak the entire plant overnight before inserting it into the ground.
When it is time to plant your roses, start by digging an area for them that is deeper and wider than you would anticipate. This will allow the roots to grow properly over time. Make sure to mix soil from the dug-up hole with compost and other necessary nutrients, and then insert the rose plant at least two inches below soil level. In areas with very cold winters like New England, four inches may be a better choice. This is the opposite of most plants, which should be plated 1-2 inches above the soil level.
After the initial planting, watering is the most significant part of your rose-care. You should water your plants between one and two times per week, depending on the dryness of your climate. Make sure to water deeply, so that it reaches the roots. However, make sure to not drown the plant, as it will not thrive in too much water, either.

In terms of fertilizing the flowers, apply a balanced granular fertilizer about once per month from April to July—the key growth months.
This is just one important form of maintenance, however. Pruning is incredibly important when it comes to rose-care. The plant should be pruned every spring season right after the last frost. Make sure to wear proper gloves, goggles, and arm protection to prevent cuts or scrapes or other bodily harm from pointy thorns.
The main goal of proper pruning is to keep the plant trimmed to a point where air can circulate and reach to the center without a problem. Pruning should always be done right above the “bud eye” of the plant, otherwise identified as the area right above a set of mature leaves. Remove any sections that may become unsupported or that have died since the last pruning.
Tulips:
Tulips were another very popular part of Mother’s Day arrangements this year. These pretty flowers should be planted as bulbs in fall and will flower in springtime.

When choosing a location for these flowers, choose one that will allow for full sun and soil that will have proper drainage. Before you even begin planting, give yourself time to prep the soil by mixing in organic compounds.
When it comes time to plant the tulips, dig a hole at least 6 inches deep and insert the tulips pointed end-up. There should be at least 4 inches of soil resting on top of the bulb once it is buried, and you want to make sure the soil is several inches deeper than the bulbs you plant so roots can extend downwards.
In terms of layout, you should aim to plant roughly five tulips per square foot with about 5 inches between each of them. Tulips that have been grouped together like this will look best once they bloom. Once planted, firm the soil and give it a thorough watering.
Post-installation care for tulips is fairly easy, at least for the first year. Fertilizer is unnecessary, as the bulbs come with all the food they need inside them in order to bloom the first season. You also should not water again after the initial post-installation watering until leaves appear.
A good tip for those living in cold-winter areas, is to apply straw mulch to the soil about a month after planting has taken place.
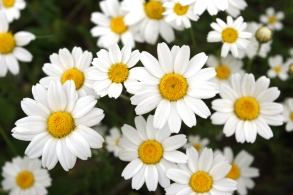
Daisies:
Daisies come in a variety of species, but the most common in the North East are Shasta Daisies, which are the classic white daisies you see in many gardens. These flowers are common perennials and have large, beautiful blooms.
You can really choose any time of year to begin sowing seeds for daisies, however doing so in autumn or spring is ideal. The perennials should then be divided later in that season. Seeding directly is another option, which will result in blooming of the flowers the following spring.
When choosing a location to plant these daisies outdoors, make sure to pick a spot with full sun and moderately fertile, well-drained soil. Till garden beds using a garden fork to ensure the soil is loose before planting. Remember to mix in compost with the dirt, as well. The holes should be spaced one to two feet apart from one another at a depth twice as wide as the pot the plant first started in. If removing from a pot like this, be sure to place the partially grown plant in the hole deep enough so that the root ball is level with the ground. Then fill the area around the root ball in with the dirt/compost mix and water thoroughly.
In terms of post-installation care, water during summer months only if the flowers aren’t getting a lot of natural rain water. Be sure to prune the stems back after the first “killing frost” so that they are only an inch or two above the soil line.
Because they are perennials, it’s important to consider their long-term care, as well. You should divide the plants in early spring or late summer every 3-4 years to ensure their health.
Picking The Flowers For An Arrangement:
When it comes time to cut fully grown flowers to add to a bouquet, make sure to use a pair of sharp and clean shears. Aim to cut the plant right after it has reached the bud stage, as this is the ideal look and size for an arrangement. Make sure to water the plant before you begin cutting, then aim to the cutting itself in the early morning, before it gets to hot out. Cut the flowers at a 45 degree angle, remove any excess leaves, and place the plant in a bucket of warm water. Make a second 45 degree angle cut while the flower is resting in the warm water. This will keep the flowers looking fresh until it’s time to add them into your arrangement!
Taking the time to plant and grow the flowers for next year’s Mother’s Day bouquet is sure to put an extra special smile on Mom’s face! She will appreciate the gesture, and you will appreciate the savings! On top of that, there are many occasions throughout the year that are perfect for flowers, including Valentine’s Day, anniversaries, birthdays, and more!
While the flowers listed in this article are truly some of the most straightforward to plant, if you decide you need help, consider contacting your local landscapers to learn more about proper installation and maintenance techniques. You can also hire a landscape design and maintenance team like Twin Pines’ to plant and help grow these flowers for you!
If you are in the MetroWest MA area and need this assistance, feel free to reach out to us at Twin Pines by calling (508) 358-4231! We would be happy to help!


